Ever wondered what goes into drilling a well that’s essential for extracting valuable resources like oil or gas? The process is more complex than it seems, requiring meticulous planning, a host of specialized equipment, and a deep understanding of geological formations.
This guide is here to demystify the process and break it down into 9 essential steps for drilling a well. Whether you’re an established business owner in the energy sector or an entrepreneur considering entering this field, comprehending these steps is critical for your venture’s success. As a seasoned drilling expert, I can assure you that mastering these steps will fundamentally transform your well-drilling strategy.
So, dive in and let this guide lead you to an efficient, more productive well-drilling future!
Step#1 Pre-Drilling Considerations
A strategic approach to well drilling begins with meticulous pre-drilling considerations. Addressing these pre-requisites helps ensure a smooth drilling process, minimizing potential risks and maximizing productivity. The main areas of focus here are the ff:
Assessing Legal Requirements
A thorough understanding of the legal landscape and environmental implications is paramount before initiating any drilling activity. Laws and regulations vary by region, making it essential to understand local guidelines to prevent potential legal issues. Understanding environmental impacts is critical for promoting sustainable drilling practices.
Site Survey
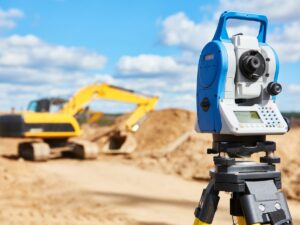
An in-depth site survey lays the foundation for a successful drilling operation. The goal here is to understand the geological structure and hydrological conditions of a potential site to optimize the drilling process. In addition, this step can identify any potential hazards, allowing for improved risk mitigation.
Obtaining Permits
No drilling project can commence without obtaining the necessary permits and permissions. This step is all about working closely with regulatory authorities, ensuring all documentation is accurate and up-to-date, and securing the green light for drilling operations.

Consulting with Professionals
The pre-drilling phase greatly benefits from the expertise of professionals from various fields. The saying, “Teamwork makes the dream work,” holds true in well drilling. By consulting with professionals, the operation can be optimized to ensure efficiency, productivity, and sustainability. These professionals are listed below:
- Geologists: They are experts in understanding the earth’s structure and mineral composition. Their in-depth knowledge can provide crucial insights into the location and accessibility of resources.
- Hydrologists: They specialize in the study of water. They can provide information about the availability and movement of ground water, a crucial aspect of well drilling.
- Drilling Engineers: With their extensive knowledge of drilling methods and machinery, they can suggest the most efficient ways to conduct drilling operations.
- Environmental Consultants: They offer guidance on minimizing environmental impact and ensuring compliance with regulations, thereby contributing towards a more sustainable drilling process.
Step#2 Gathering Essential Tools and Materials
According to a report by IBIS World, the market size of the water well drilling services industry in the US has grown 4.4% per year on average between 2018 and 2023. The right equipment ensures a safe and efficient drilling operation. The choice of tools and materials largely depends on the specifics of the project.
This step covers the necessary tools for drilling a well, followed by the materials required for the drilling process. Let’s know more about these things:
Tools for Drilling a Well
Choosing the correct tools for the job can make a significant difference in the success of a well-drilling project. The right tools not only make the job easier but also contribute to the safety and efficiency of the operation. Here are four essential tools required for well drilling:
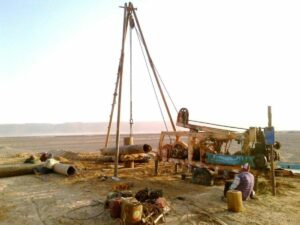
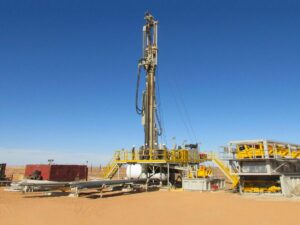
- Drilling rig: This is the heart of any drilling operation, as it’s responsible for creating the borehole.
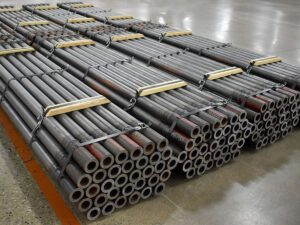
- Drill pipes: These are used to transmit rotational power from the surface to the drill bit, enabling the drilling process.
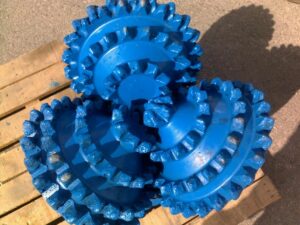
- Drill bits: These are used to break and remove subsurface formations.
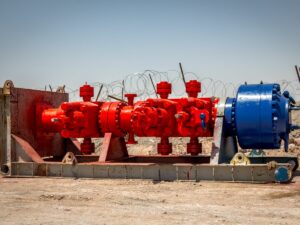
- Blowout preventer: This safety device is designed to seal, control, and monitor wells to prevent blowouts. An excellent craftsman always has this tool, to always make sure to have the best at hand.
Materials for the Drilling
Materials used in the drilling process play a significant role in determining the operational success and longevity of the well. The right materials not only facilitate the drilling process but also ensure the well’s stability once it’s complete. Here are four essential materials for the drilling process:
- Drilling mud: This is used to cool and lubricate the drill bit, stabilize the borehole, and carry the cuttings to the surface.
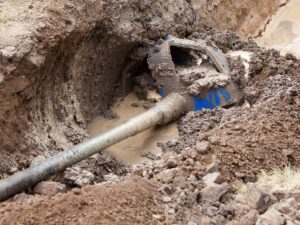
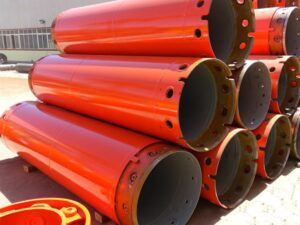
- Casing: This pipe is installed in the well after drilling to provide structural integrity. Being a seasoned expert, it’s clear that high-quality casing are as crucial as the tools themselves. It contributes to a successful drilling process and the longevity of the well.
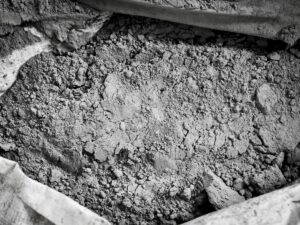
- Cement: This is used to secure the casing and seal the wellbore to prevent leaks.
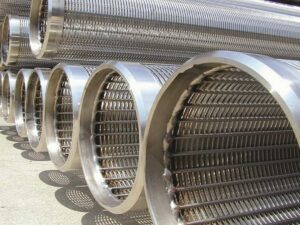
- Well screens: These are installed in the well to prevent sand and sediment from entering while allowing water to flow into the well.
Step#3 Well Design and Planning
Designing and planning a well forms the cornerstone of an efficient drilling operation. It involves a thorough understanding of the project itself. The precise planning of these aspects ensures the functionality and longevity of the well. Let’s know more about this process:
| Step |
Description |
| Site Selection |
Through geological surveys and studies, the best location for drilling is determined. |
| Acquiring Permissions |
Before drilling can commence, necessary permissions and permits must be obtained from relevant authorities. |
| Site Preparation |
The chosen site is cleared and prepared for drilling. This includes setting up access roads, storage areas, etc. |
| Rig Setup |
The drilling rig is transported, assembled, and tested on the site to ensure everything is ready for drilling. |
| Drilling |
The actual drilling process begins. This is done in stages, with casing inserted to provide structural integrity as the hole gets deeper. |
| Logging |
Once the desired depth is reached, logging tools are used to gather information about the geological formations that have been drilled. |
| Testing |
After logging, tests are conducted to determine if the well can produce in commercial quantities. |
| Completion |
If the well is viable, it’s completed by placing production tubing in the well and fitting the wellhead equipment. |
| Site Restoration (for dry wells) |
If the well isn’t viable, it’s plugged and the site is restored to its pre-drilling condition as closely as possible.
|
Optimal Well Type
Selecting the optimal well type is a crucial first step in the well design process. This choice depends on several factors such as geology, groundwater conditions, and project requirements. The four common types of wells are the ff:
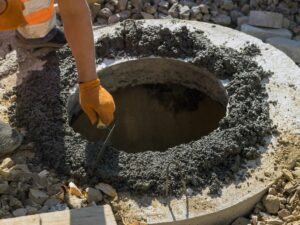
- Dug wells: Are traditionally created using a shovel or backhoe. They are typically shallow and vulnerable to contamination due to their proximity to the surface. For me, their simplicity and low-cost make them a viable option for certain applications.
- Bored wells: Like dug wells, they are also shallow but are typically wider in diameter. These wells are often used when the water table is just below the surface.
- Driven wells: Are characterized by a small-diameter pipe driven into soft earth like sand or gravel. These are usually employed when there’s a shallow water table.
- Drilled wells: Are created by powerful drill rigs. These can reach deep groundwater levels, providing a reliable water source even in areas with lower water tables. It’s like tapping into nature’s hidden reservoirs, a testament to human ingenuity.
Calculating Well Depth and Diameter
The well’s depth and diameter are fundamental design aspects that influence the well’s productivity and stability. Depth determination is often based on groundwater level and expected yield. The well’s diameter, on the other hand, is influenced by factors like the casing size and the type of drilling machinery used. Let’s understand how to calculate the ff:
- Well depth: To calculate the depth of the well, it’s crucial to identify the depth of the water table. Once the water table level is known, the desired depth for the well can be determined based on the required water yield. For example, if the water table is at 100 feet and a large water yield is needed, the well might be drilled to a depth of 150-200 feet.
- Well diameter: The diameter is often determined by the type of drilling equipment used, regulatory guidelines might also dictate minimum and maximum diameters. For example, if using a drilling rig creating a hole up to 12 inches in diameter, and the casing used is 8 inches, then a diameter of 10-12 inches might be chosen to ensure sufficient space for installation and grouting.
Step#4 Site Preparation
Site preparation is the initial physical step in the well-drilling process. It involves clearing the drill site, implementing safety measures, and establishing access to the water source. Each of these steps ensures a safe and efficient drilling operation. Here’s how it works:
Clearing Drill Site
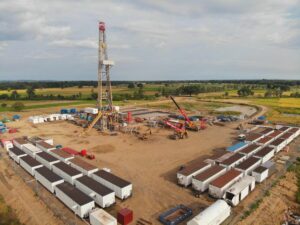
A clear and organized drill site provides a safe working environment and allows for optimal drilling operations. It involves the removal of vegetation, rocks, or other obstacles that might hinder the drilling process. A level ground is also essential for the stable setup of the drill rig. Clearing a site is not just about removing obstacles; it’s also about setting the stage for a successful drilling operation.
Safety Measures
Safety measures like securing the site boundaries, providing safety training to the workforce, and ensuring proper personal protective equipment (PPE) are in place are essential. Regular safety audits and inspections should also be conducted to maintain a safe environment. After all, a safe work environment is a productive one.
Establishing Access to Water Source
To drill a well, establishing a direct access route to the identified water source is crucial. This might involve mapping out the drilling direction and depth based on geological surveys. Accessibility to the water source significantly affects the ease and success of the drilling operation.
Step#5 Drill Rig Setup and Operation
Setting up and operating the drill rig forms the core of the drilling process. Let’s explore the highlighted activities in this step:
Right Drill Rig
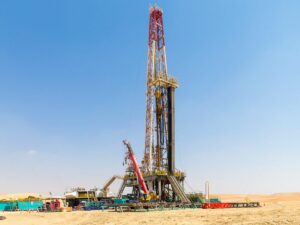
The drill rig selection depends on factors like the well’s depth, diameter, and geological conditions of the site. There are a variety of drill rigs available, each suited for specific well configurations and soil conditions. The right drill rig ensures an efficient and successful drilling operation. Drillrigy, as a leading manufacturer of drill rigs, offers a wide range of options, ensuring you have the right equipment for your specific needs.
Assembling and Installing the Drill Rig
Once the right drill rig is selected, it needs to be assembled and installed at the drill site. This process includes assembling the various parts of the rig as per the manufacturer’s instructions and positioning it over the drilling point. Proper assembly and installation of the drill rig set the tone for the entire drilling process.
Familiarizing Drill Rig Controls
Being thoroughly acquainted with the drill rig controls and safety features is vital for safe and efficient operation. This includes understanding the control panel, emergency shutdown system, and safety mechanisms. A detailed review of the operator’s manual and hands-on training can aid in this familiarization.
Operating Drill Rig Safely
The drill rig is operated to create the well. This involves monitoring the drilling speed, managing the drilling mud, and ensuring the drill bit is advancing correctly. During operation, all safety measures should be strictly adhered to, and any signs of trouble should be immediately addressed.
Step#6 Drilling Process
The drilling process is a vital step in the construction of a well, involving the actual boring into the ground to reach the water-bearing formations. It has multi-process continues until the desired depth is reached, addressing potential issues such as stuck pipes and caving along the way. Here are detailed activities with this step:
Preparing Drill Bit and String
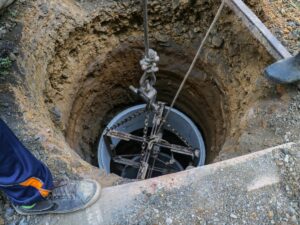
This involves ensuring the drill bit is in good condition and correctly attached to the drill string. The length and strength of the drill string must align with the depth and diameter of the well planned. From my experience, a well-prepared drill bit and string set the foundation for a smooth drilling process.
Initiating Drilling Process
The actual drilling starts with the operation of the drill rig. The drill string is lowered into the borehole, and the rotation and pressure are applied. The drill cuttings are continuously removed to avoid clogging. It’s a fascinating dance of machinery and geology, each playing their part in this intricate process.
Monitoring Drilling Parameters
During the drilling, parameters like drilling speed, rotational torque, and drilling fluid flow rate are continuously monitored. These parameters must be adjusted based on the progress and geological conditions encountered to maintain optimal drilling efficiency and to avoid drill bit wear.
Addressing Potential Issues
The drilling process can face potential issues like a stuck pipe or caving. These situations require immediate attention and should be resolved using appropriate procedures to ensure safety and to prevent damage to the drill string or borehole.
Step#7 Well Development
Well development is a crucial phase post-drilling where the well is cleaned, disinfected, and tested to ensure optimal operation. Let’s dive into the important activities to ensure a productive well:
Flushing and Cleaning
After drilling the well should be thoroughly flushed and cleaned to remove any remaining drill cuttings or mud. This helps to clear the water-bearing formations and improves the well’s productivity. Proper well cleaning after drilling can significantly enhance the water yield.
Well Disinfection
Once cleaned, the well must be disinfected to eliminate any potential contaminants. This typically involves introducing a disinfectant, like chlorine, into the well and leaving it for a specified time before flushing. Think of it as giving the well a thorough bath before its big debut.
Pumping Tests
Pumping tests are carried out to determine the well’s yield and any potential impact on the water table. The results of these tests can provide valuable information for designing the pumping system and managing the water resource sustainably.
Step#8 Well Completion and Installation
This steps ensures structural integrity and prevent contamination of the water supply. These processes include the following activities:
Installing Well Casing
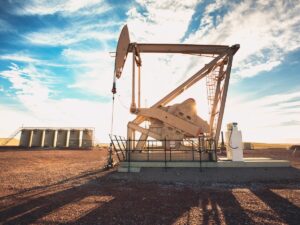
A well casing is installed inside the drilled hole to prevent it from collapsing and to protect the water-bearing formation from contamination. It is generally made from durable materials like steel or PVC that can withstand the underground environment and pressure variations. With Drillrigy’s high quality drilling equipment, the installation of well casing becomes a seamless process, ensuring the longevity and safety of your well.
Well Screen and Gravel Pack
The well screen, positioned at the lower end of the casing, filters out sediments from the water entering the well. A gravel pack is placed around the screen to provide additional filtration and to support the formation. This configuration ensures a high-quality water supply. The proper placement of the well screen and gravel pack plays a significant role in the productivity and longevity of the well.
Sealing the Annular Space
The annular space, the gap between the well casing and the wall of the drilled hole, needs to be properly sealed. This is usually done by filling it with a special material known as grout, which prevents surface contaminants from entering the well. At this point, the well construction is essentially complete, and it is ready for use.
Step#9 Post-Drilling Procedures
Post-drilling procedures comprise the necessary steps taken after a well has been drilled and completed. Here are the essential activities that are done in this step:
Water Quality Testing
A water sample from the new well should be tested for potential contaminants and to verify that the water meets acceptable standards. As per the statement of WellWater, let the water run for 2-3 days after well completion to clear off the sediment. The testing parameters may include physical, chemical, and microbiological elements, depending on the local regulations and the intended use of the water.
Obtaining Rights and Licenses
After ensuring water quality, the necessary water rights and licenses must be obtained as per local regulations. This process typically involves filing an application with the respective authority and may require details about the well and its expected usage. It’s like getting a passport for every well, ensuring it’s all set for its journey ahead.
Setting Water Treatment Systems
If the water quality tests indicate the presence of contaminants that can’t be eliminated by flushing or disinfection, a water treatment system might be required. The type and complexity of the system depend on the type and concentration of the contaminants present. It is crucial to have a water treatment system tailored to the specific needs of well water for reliable and safe use.
Maintenance and Inspection Schedule
A maintenance and inspection schedule should be established to ensure the well operates efficiently over its lifetime. Regular checks can help identify any issues early, thus reducing potential downtime and costly repairs.
Dive Deeper Into Our Resources
Looking for more diverse product options? Browse through our handpicked selections:
For some insightful reads, we’ve curated a list of recommended articles just for you:
Still haven’t found what you’re looking for? Don’t hesitate to contact us. We’re available around the clock to assist you.
Conclusion
Drilling a well is a complex process that requires careful planning and adherence to safety and regulatory standards. Remember, it’s not just about drilling a hole in the ground; it’s about tapping into nature’s hidden resources in a responsible and efficient manner.
If you’re a business owner considering drilling a well, don’t hesitate to contact us today at Drillrigy for more drilling product details or any queries you might have. We’re here to answer your questions and guide you through the process. After all, your success is our success. So, let’s dig deeper together!


