Has anyone thought of what it takes to efficiently drill a well, a crucial element in accessing one of the most valuable resources – water? This process, although seemingly straightforward, involves careful planning and precision.
With years of experience in the well drilling machine sector, our insights are grounded in practical knowledge and industry best practices.
The well drilling process is a series of carefully executed steps, starting from site selection to the final construction of the well. Each phase plays a crucial role in ensuring success.
In this guide, we will delve into the 8 essential steps in the well drilling process, providing a complete look at each stage.
Read on to explore a comprehensive roadmap to successful well drilling.
Step#1 Preparation and Planning
To begin the well drilling process, thorough preparation and planning are indispensable. Here are the essential steps to ensure a well-laid foundation:
- Site Selection and Assessment: The first step is to choose an optimal site. Based on my experience, selecting the right location is not just about finding water; it’s also about ensuring environmental safety and regulatory compliance. Consider factors like geology, water level measurement, and contaminants.
- Obtaining Necessary Permits: Before any drilling can commence, obtaining the required permits is crucial. I’ve found that going through the bureaucratic process can be challenging, but it’s essential for legal compliance. Engage with local authorities early to understand the specific requirements in your region.
- Conducting a Geological Survey: Then, a geological survey helps in understanding the subsurface conditions. This step involves analyzing soil types, rock formations, and groundwater levels. For example, in a recent project, a survey revealed a dense rock layer that required specialized drilling equipment.
- Designing the Well and Choosing Equipment: Lastly, based on the site assessment and geological survey, design the well and select the appropriate drilling equipment. Drillrigy’s water well drilling machines guarantee peak performance even in the most challenging geological conditions.
Step#2 Setting Up the Drilling Rig
Following the comprehensive preparation and planning, the next critical step is setting up the drilling rig. Here are the key stages in this process:
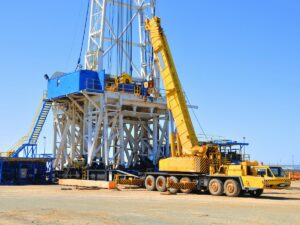
- Transporting and Positioning the Rig: Start with transporting the drilling rig to the selected site. In my experience, ensuring safe and efficient transportation is as vital as the drilling itself. Use heavy-duty vehicles suitable for the terrain and carefully position the rig over the drilling spot, ensuring stability and alignment.
- Assembling the Rig Components: Next, assemble the rig components. This includes setting up the mast, installing the drill string, and connecting the power system. For example, in a project I worked on, precise assembly was crucial to avoid operational delays and ensure safety.
- Testing and Calibrating Equipment: Then, conduct a thorough test of the drilling rig to ensure everything is functioning correctly. This step involves checking the drill’s operational range. Proper testing can prevent potential equipment failures and accidents during drilling operations.
Step#3 Drilling the Borehole
With the drilling rig perfectly set up, the next phase is the actual drilling of the borehole. Let’s break down this process into its critical steps:
- Initiating the Drilling: Begin with the drilling operation using the rig. I have seen that starting slowly helps in establishing a stable borehole. High-quality drilling machines, like those from Drillrigy, offer precision and efficiency, which are crucial in this initial phase.
- Monitoring Drilling Progress: Next, continuously monitor the drilling progress. It’s essential to keep an eye on drilling speed, depth, and potential obstructions. Regular monitoring helps in adjusting the drilling parameters for optimal performance and safety.
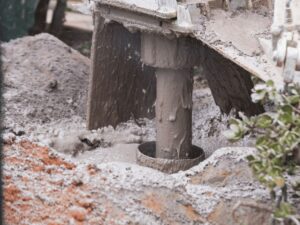
- Managing Drill Cuttings: Then, manage the drill cuttings efficiently. This involves removing the debris created during drilling to maintain a clear drilling path. Efficient handling of cuttings is crucial to prevent blockages and ensure smooth drilling.
- Adjusting Techniques Based on Geological Conditions: Finally, adjust drilling techniques according to the geological conditions encountered. Different soil and rock types may require changes in drill bit type, speed, or pressure. Adapting to these conditions is key to efficient and successful borehole drilling.
Step#4 Removing Debris
After drilling the borehole, the next crucial step is the removal of debris. This process ensures a clean and safe structure. Let’s see the process involved in this essential step:
- Utilizing Debris Removal Equipment: First, deploy specialized debris removal equipment. This equipment, designed to handle various types of drill cuttings and debris, is essential for a clean and clear borehole. High-capacity removal systems are effective in managing both solid and liquid waste materials.
- Using Machines for Enhanced Efficiency: Second, consider using machines for debris removal. In my experience, some machinery offers superior efficiency and reliability, which are important in this phase. Choose machines that are specifically designed to handle debris removal in well drilling operations.
- Continuous Monitoring and Adjustment: Then, continuously monitor the debris removal process. It’s important to adjust the equipment settings based on the volume and type of debris being extracted. Efficient monitoring and adjustment ensure that the borehole remains clear and uninterrupted.
- Disposing of the Debris Safely: Finally, ensure the safe disposal of the debris. Proper disposal is not only an environmental necessity but also a regulatory requirement in many regions. In my role, prioritizing eco-friendly and compliant disposal methods has always been a key concern.
Step#5 Casing and Cementing
Following the debris removal, casing and cementing the borehole are critical for stabilizing and protecting the well. Here are the processes involved in this essential step:
- Selecting and Installing the Casing: First, select the appropriate casing for the well. The casing, a large pipe, is inserted into the borehole to prevent it from collapsing. I believe choosing the right material and size for the casing is crucial for the long-term integrity of the well.
- Positioning the Casing: Second, carefully position the casing in the borehole. This process often involves using cranes or hoisting systems to lower the casing into place. Ensure that the casing reaches the desired depth and is properly aligned within the borehole.
- Preparing Cementing Mixture: Then, prepare the cementing mixture. The cement, typically a blend of water, cement, and additives, is formulated to secure and seal the space between the casing and the borehole walls. The right consistency and composition of the cement are important for effective sealing.
- Pumping Cement and Sealing: Finally, pump the cement into the space between the casing and the borehole walls. From my perspective, this step must be done with precision to ensure a complete seal, which prevents water contamination and stabilizes the well structure.
Step#6 Well Development and Testing
With the casing and cementing completed, the next phase is well development and testing. This stage is crucial to ensure the well’s functionality and safety. Let’s explore the steps involved in this process:
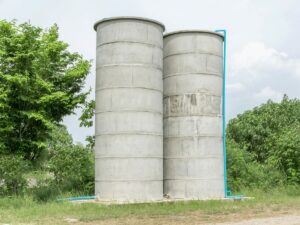
- Cleaning and Developing the Well: Beginning with well development, wherein it involves cleaning and flushing out the borehole to ensure clear water flow. This step often uses airlifting or over-pumping techniques to remove any remaining debris and fine particles.
- Conducting Pump Tests: Second, conduct pump tests to determine the well’s yield and drawdown. I have seen these tests are essential for assessing the well’s capacity and sustainable water extraction rate. During these tests, it can reveal important information about the aquifer’s characteristics and recharge rate.
- Water Quality Testing: Then, test the water quality. This step includes analyzing the water for contaminants, chemical composition, and biological organisms. I’ve found that ensuring the water meets health and safety standards is not just a regulatory requirement but also a moral responsibility.
- Making Necessary Modifications: Finally, based on the test results, make any necessary adjustments. This may involve modifying the pump size, changing the screen, or implementing water treatment solutions. Ensuring that the well operates efficiently and safely is a continuous process of attention.
Here’s a table outlining the steps for making necessary modifications in well operations based on test results:
| Step |
Description |
Purpose |
| Analyzing Test Results |
Reviewing the outcomes of various tests conducted on the well. |
Determines if the current setup is efficient or needs modifications. |
| Modifying Pump Size |
Adjusting the size of the pump as per the well’s requirements. |
Ensures optimal water extraction without overburdening the well structure. |
| Changing the Screen |
Replacing or adjusting the well screen for better filtration. |
Enhances the quality of water extracted and prevents sediment influx. |
| Implementing Water Treatment |
Introducing water treatment methods if required. |
Improves water quality and ensures it meets safety standards. |
| Continuous Monitoring |
Regular monitoring and modification of the well setup. |
Guarantees the long-term efficiency and safety of the well. |
Step#7 Installing the Pump System
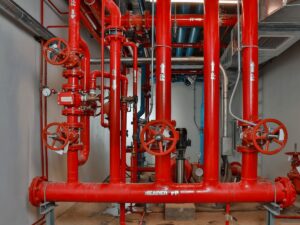
After well development and testing, the next critical step is installing the pump system. This is a key component in ensuring the well’s operational efficiency. Here are the steps to follow in this process:
- Choosing the Right Pump: Start with selecting the appropriate pump for the well. The choice depends on the well depth, water yield, and intended use. From personal experience, investing in a high-quality pump is crucial for long-term efficiency and reliability.
- Preparing the Pump Installation: Second, prepare for the pump installation. This involves ensuring that the well is clean and free of any obstructions. As per GVR, the global pumps market size was estimated at USD 57.7 billion in 2023. Preparation is essential to prevent damage to the pump and ensure a smooth installation process.
- Installing the Pump: Then, proceed with the pump installation. Carefully lower the pump into the well, ensuring it is properly positioned and secured. It’s important to follow the manufacturer’s guidelines meticulously to avoid any operational issues.
- Testing the Pump System: Finally, test the pump system to ensure it is functioning correctly. This includes checking the water flow rate, pressure, and overall system performance. Regular maintenance and testing are key to sustaining the pump’s efficiency and the well’s longevity.
Step#8 Finalizing the Well
Following the installation of the pump system, the final step is to complete the well construction. This stage ensures that the well is fully operational and meets all necessary standards. Let’s see the key actions required to finalize the well:
- Sanitizing the Well: First, sanitize the well to eliminate any biological contaminants. This process typically involves circulating shock chlorination or another disinfectant throughout the well and plumbing system. Sanitization is crucial for ensuring the water is safe for use.
- Installing Wellhead Protection: Second, install a wellhead and ensure it is properly sealed. This is a critical step in protecting the well from external contaminants. I’ve always emphasized the importance of a secure wellhead as it safeguards the water quality and the integrity of the well.
- Setting Up Surface Infrastructure: Then, set up the necessary surface infrastructure. This includes constructing access roads, installing electrical connections for the pump, and ensuring proper drainage around the well site. Proper infrastructure ensures easy access for maintenance and stable operation.
- Documentation and Compliance Check: Finally, complete all necessary documentation and ensure compliance with local regulations. This includes recording the well depth, materials used, and test results. As someone who values diligence, I believe thorough documentation is key for future reference.
Conclusion
To sum it up, following these 8 essential steps will significantly streamline every well drilling process, ensuring efficiency, safety, and compliance. This guide provides a comprehensive roadmap, from preparation to the finalization of the well.
For businesses seeking top-quality well drilling machines, Drillrigy offers a range of reliable options that cater to every specific need. To explore our products and services, feel free to contact us today!


